
How to Build a Cheaper Home Repair Kit Without Overspending
Build a lean, budget-friendly home repair kit with only the essentials and skip overpriced bundles that add little real value.
How to Build a Cheaper Home Repair Kit Without Overspending
If you want a home repair kit that actually helps you fix common problems without draining your budget, the answer is not to buy the biggest bundle on the shelf. The best starter tool kit is lean, durable, and built around the jobs you will genuinely do: tightening loose hardware, hanging small items, replacing batteries, opening packaging, checking measurements, and handling simple fixes before they turn into expensive service calls. That’s the core idea behind a smart tool value guide: buy for usefulness, not for quantity.
Retailers love to sell oversized boxes packed with low-grade extras because they feel like a bargain, but many of those extras are duplicates, weakly made, or too specialized for a typical homeowner. A cheaper kit is not the same thing as a flimsy kit. It means choosing the right mix of DIY essentials, watching for tool deals, and skipping the “everything included” temptation that often leads to wasted money. For broader saving strategies that apply across purchases, our saving playbook and subscription savings guide show the same principle: pay for value, not packaging.
In this guide, we’ll build a practical, budget-conscious repair kit from the ground up. We’ll cover what to buy first, what to skip, how to compare price versus durability, and how to take advantage of sales like the current tool promotions highlighted in this electric screwdriver deal and the tool discounts in Home Depot’s spring tool roundup. If your goal is to save on tools without compromising usefulness, start here.
What a Budget Home Repair Kit Should Actually Cover
Think in terms of daily problems, not dream projects
A budget home maintenance kit should solve the most common “small but annoying” issues around the house. That usually means loose screws, picture hanging, minor furniture assembly, battery swaps, tape-and-measure tasks, and light adjustments on fixtures or cabinets. You do not need a cabinet full of specialty tools for that, and you definitely do not need a bundle that includes items you may never touch. A focused kit gives you faster access, lower cost, and less clutter in the long run.
One helpful way to decide what belongs in the kit is to list the problems you’ve had in the last 12 months. If you needed to tighten a door hinge, assemble a shelf, patch a minor snag, or locate a wall stud, those are your actual buying signals. For a broader example of value-first buying, see our luxury vs budget rentals guide, which uses the same idea: match spend to real needs. Also useful is the real price of a cheap flight, which shows how hidden costs can erase apparent bargains.
In practice, a truly useful kit for a new homeowner or renter often fits into three tiers: must-have hand tools, optional convenience tools, and project-specific add-ons. This structure prevents overspending because you buy the first tier now and postpone the rest until a task proves you need them. That approach is especially important in 2026, when tool promotions can make it easy to overbuy simply because the bundle is discounted.
The “bundle trap”: why more pieces can mean less value
Big tool bundles often advertise impressive piece counts, but those counts can be misleading. A 100-piece set may include identical screwdriver bits, cheap zip ties, undersized pliers, and a weak flashlight—all items that pad the headline number while offering little practical value. If you only need a hammer, measuring tape, and reliable screwdriver, the bundle’s extras are not a savings; they are hidden cost inflation. A better rule is to ask, “Would I buy each item separately if I needed it tomorrow?”
Bundle pricing can also disguise poor quality. A low-price kit may include tools made from softer metal, weak grips, or bits that strip easily, which means you replace them sooner. That is not saving; that is paying twice. For shoppers who want to avoid that mistake, this pricing and warranty guide is a useful analogy: the cheapest option is not always cheap in the long run.
Another issue is redundancy. Many kits include three nearly identical screwdrivers or multiple hex key sizes you will never use. Those repeated items make the package look generous but do not improve capability. A compact kit with fewer, better-chosen tools usually outperforms a giant set for day-to-day use, especially when you’re trying to keep your budget home repair setup simple and dependable.
Set a realistic starter budget before you shop
Instead of asking, “How much can I save on the biggest kit?” ask, “What is the maximum I should spend to cover the first 80% of household fixes?” For many shoppers, that means creating a starter tool kit in the $50 to $150 range, depending on whether you already own basics like a tape measure or a drill. Your budget should reflect your living situation: apartment dwellers need fewer heavy-duty items than homeowners with frequent maintenance needs. If you already have a drill or driver, your next purchase should fill the most obvious gap, not duplicate what you own.
A clean budget also makes sale shopping easier. If the electric screwdriver you were planning to buy drops 50%, as seen in the Fanttik S1 Pro deal, you can evaluate whether it replaces a manual screwdriver in your kit or simply adds convenience. Likewise, if a retailer offers buy-one-get-one tool offers, you can compare the second item against your needs instead of buying it because it feels free.
The Essential Tools Worth Buying First
Priority #1: tools that solve the most common fixes
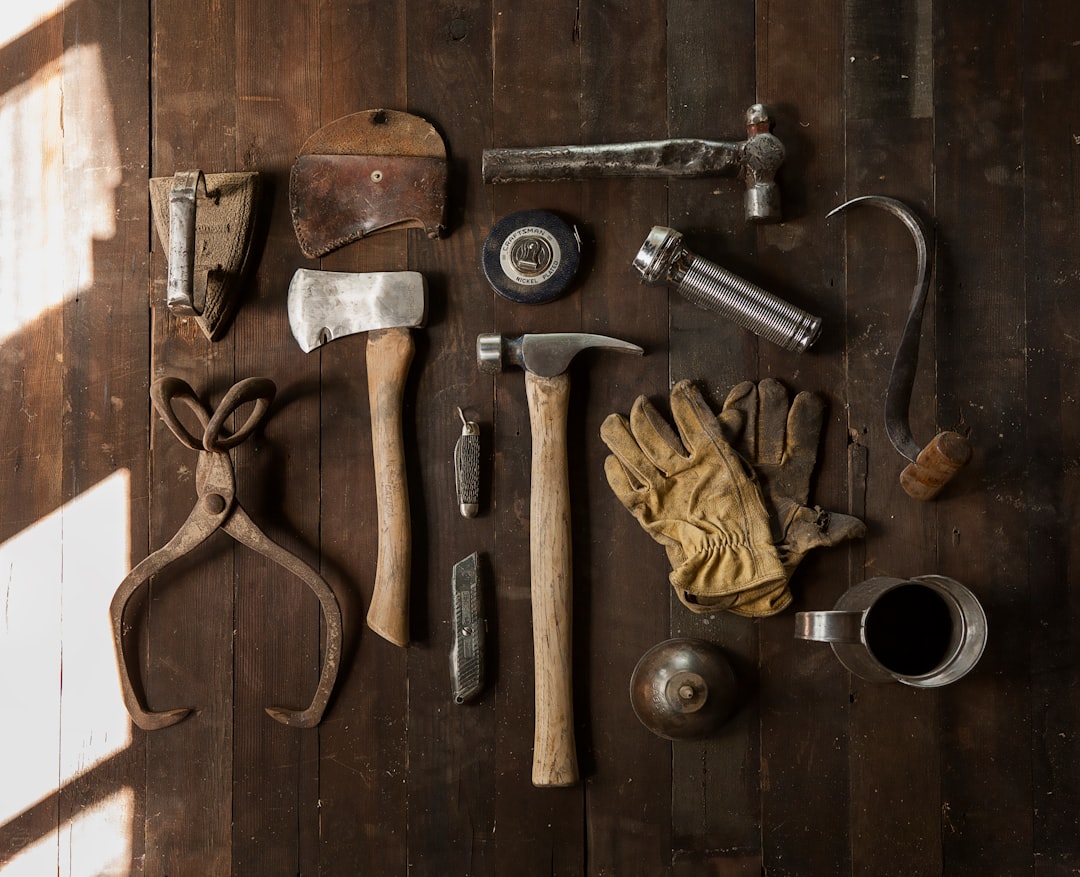
Your first purchases should support repairs you’ll use again and again. A good hammer, a reliable tape measure, a multi-bit screwdriver, an adjustable wrench, pliers, a utility knife, and a flashlight cover a huge range of household issues. These are the backbone of most DIY essentials because they work across furniture assembly, picture hanging, basic plumbing adjustments, and quick tightening jobs. If you only buy one category at a time, start with these before moving to niche items.
The screwdriver deserves special attention because it is one of the most used tools in any home repair kit. A manual multi-bit handle is the best value starting point, but an electric screwdriver can be worth it if you do regular assembly work or have hand fatigue. The current discounts on compact drivers, like the one highlighted by ZDNet’s Fanttik S1 Pro coverage, are worth considering when the price gap between manual and powered tools narrows. For shoppers who want a broader view of tool promotions, our tool deal roundup shows how seasonal sales can reduce the cost of essential brands.
When comparing these tools, focus on grip quality, shaft material, size range, and warranty rather than fancy packaging. A tool that feels balanced in your hand and holds up over time is better value than a flashy set with more pieces. This is the same mindset we recommend in our saving guide for sports gear: spend where performance matters and trim where branding adds no function.
Priority #2: measuring, marking, and safety basics
Many shoppers forget the “support tools” that make repairs easier and more accurate. A tape measure, pencil or marker, level, work gloves, and safety glasses should be part of the first wave of purchases, because they prevent mistakes and protect your hands and eyes. These items do not feel exciting, but they keep small jobs from becoming redo jobs. In a budget setup, avoiding a single mistake can save more money than a flashy extra tool ever will.
A level matters when you hang shelves, frames, or curtain rods, and a good tape measure prevents unnecessary returns caused by incorrect sizing. Gloves are also worth buying even for light work because they reduce pinches, scrapes, and dirty hands. If you want to think more like a disciplined shopper, our true trip budget article offers a similar lesson: the visible price is only part of the total cost, and the same is true for repairs that go wrong.
These accessories are often cheap individually, so they’re easy to add without blowing the budget. The trick is not buying a premium version of each one unless you truly need it. A moderately priced level that stays accurate is enough for a starter kit; a contractor-grade model is unnecessary for most homes.
Priority #3: convenience tools only after the basics are covered
Once the core kit is in place, convenience tools can be added selectively. This is where an electric screwdriver, stud finder, ratcheting screwdriver, socket set, or compact drill can help. The key is to buy these only when they solve a recurring problem or save enough time to justify the expense. A tool that makes one annual chore easier may still be worth it, but only after the foundational tools are purchased.
For example, an electric screwdriver is a smart buy if you often assemble flat-pack furniture, maintain shelves, or handle battery compartment repairs. But if you use a screwdriver only a few times a year, a high-quality manual set is usually the better value. Think of this decision like choosing between budget and luxury rentals: comfort is great, but only if it meaningfully improves the trip. You should apply the same logic when deciding whether to upgrade your repair kit.
Seasonal sales matter here. Promotions such as buy-one-get-one free tool offers can make a convenience tool worth buying, but only if the second item is genuinely useful or easy to gift. A deal is not valuable if it pushes you into buying duplicate items or tools that will sit unused in a drawer.
How to Compare Tool Value Before You Buy
Price per function beats price per piece
The most useful tool buying tip is simple: compare what the tool does, not how many accessories it includes. A five-piece set with a durable screwdriver, reliable pliers, and a decent utility knife may be a better value than a 50-piece set full of weak bits and tiny extras. “Price per function” helps you think about how many common jobs the tool can handle, not how impressive the box looks on the shelf. This mindset keeps your starter tool kit practical and cost-controlled.
It also helps to think in terms of replacement frequency. If a cheap tool will dull, bend, or strip after a few uses, its true cost is higher than a slightly pricier version that lasts years. For a more analytical approach to value, our buy-box analysis guide shows how smart shoppers and operators both focus on the underlying economics of a purchase. Similar thinking appears in subscription pruning advice, where the recurring value matters more than the sticker price.
In other words, do not let “more items” distract you from “more usefulness.” A home repair kit should reduce friction, not create clutter. If you cannot imagine a real task for an included item, it is not part of the value.
Use a simple comparison table to avoid overbuying
The table below shows how to think about common starter tools, what they’re for, and when to spend more. It is not meant to push you toward premium models; it’s designed to help you decide where budget and quality matter most. Notice that the highest-value items are not always the most expensive. A solid flashlight, for example, may save you more time and hassle than a decorative multi-tool that looks impressive but underperforms.
| Tool | What it should do | Budget buy? | When to upgrade | Value check |
|---|---|---|---|---|
| Multi-bit screwdriver | Handle most household fasteners | Yes | If bits strip or handle slips | Choose magnetic bit retention and durable steel |
| Hammer | Light nailing and minor demolition | Yes | If you do frequent carpentry | Comfortable grip matters more than weight |
| Tape measure | Measure furniture, walls, and clearances | Yes | If blade bends or locking fails | A readable blade and sturdy lock are enough |
| Adjustable wrench | Loose plumbing fittings and bolts | Yes | If jaws slip under pressure | Jaw smoothness and fit beat flashy finish |
| Utility knife | Open boxes, trim material, cut tape | Yes | If blade control feels unsafe | Blade lock and easy blade changes are key |
| Flashlight | See under sinks, in closets, and behind furniture | Yes | If runtime is short | Brightness, beam consistency, and battery life matter |
| Electric screwdriver | Speed up assembly and light screwdriving | Sometimes | If you do frequent installs | Best when discounted and ergonomically balanced |
The point of the table is not to make you buy every item. It is to show which tools are sensible starter purchases and which ones are better as later upgrades. If you want more evidence that smart shoppers win by focusing on value, our label-reading guide and proof-over-promise framework both follow the same model: look past marketing and check what the product actually delivers.
Watch for hidden costs like batteries, bits, and cases
Many “cheap” kits become expensive when you factor in what’s missing. A tool may ship without batteries, replacement blades, decent drill bits, or a useful case, forcing you to spend more later. Before checkout, review whether the item includes the accessories you need to use it immediately. This simple step can prevent the classic budget trap: a tool that looks affordable until the add-ons are purchased separately.
Cases are especially tricky. A molded carrying case can be helpful if it protects the kit and keeps pieces organized, but a bulky hard case may be wasteful if you plan to store the tools in a drawer. The right case is the one that fits your storage habits, not the one that looks the most impressive in the product photo. For shoppers who regularly track costs and extras, our expense tracking guide offers a useful habit: record the full landed cost, not just the shelf price.
Where to Save Money Without Lowering Quality
Buy the right brands at the right moment
Seasonal promotions are one of the easiest ways to save on tools without compromising quality. Spring sales, holiday events, and store-specific tool promotions can make a strong brand far more affordable than a generic set. The current wave of discounts seen in Home Depot’s spring sale coverage is a good example of when to watch for higher-quality tools at lower prices. If you can buy a reliable brand during a sale, it often beats paying less today for a tool you’ll replace next year.
That said, discount timing only helps if you already know what you need. Otherwise, you risk buying into the sale instead of buying into the plan. Make a short list before promotional browsing begins, and only compare items from that list. This is the same disciplined mindset used in our festival season price-drop guide: watch for the drop, but keep the purchase anchored to your actual goal.
If a deal is unusually deep, ask why. Is the tool being cleared out because a new model is coming? Is it a stripped-down version that lacks important accessories? A deal is strongest when it lowers the price of a tool you were already likely to buy.
Use coupons, promo codes, and retailer stacking wisely
Shoppers can often save more by combining a sale price with a coupon, loyalty perk, or store card offer. But tool buying is one area where stacking should be done carefully, because some promotions only apply to certain brands or exclude clearance items. Before you rely on a code, verify the conditions and compare the final total after tax, shipping, and any necessary accessories. That discipline is similar to the approach we recommend in our personalized coupon guide, where the best savings come from matching the offer to the purchase, not forcing the purchase to match the offer.
Also keep an eye on shipping thresholds. A small order fee can erase a good discount on a single item, especially if you’re buying lightweight accessories rather than a larger kit. If free shipping is available at a slightly higher cart total, compare whether adding one truly useful item beats paying delivery. To understand how hidden charges affect final cost, our shipping technology article is a useful reminder that fulfillment choices influence value as much as the sticker price.
The safest rule is to stack only when the math works after every cost is included. If it doesn’t, the “deal” is just a distraction.
Consider refurbished, open-box, and store-brand alternatives
Not every tool needs to be brand new. Open-box returns, refurbished items, and reputable store-brand tools can be smart buys when the item is simple and the seller offers a strong return policy. This is especially true for hand tools like hammers, tape measures, or adjustable wrenches, where basic function matters more than prestige branding. For power tools, be more cautious and inspect warranty terms closely before deciding.
Store brands can be excellent value when they’re built by known manufacturers or backed by a robust return policy. However, cheaper is only better when the tool still performs reliably under normal home use. The logic is similar to our private-label product guide, which explains when store brands are good enough and when premium versions are worth the extra money.
A practical test is to ask whether the tool has a failure mode that would create safety or frustration issues. If yes, avoid the absolute cheapest option. If no, store-brand or open-box may be the smartest buy in your entire kit.
How to Build the Kit in Phases
Phase 1: the six-tool minimum
If you’re building from scratch, start with a minimum kit that covers the widest range of tasks. The essentials are a multi-bit screwdriver, hammer, tape measure, adjustable wrench, utility knife, and flashlight. That six-tool setup handles a surprising number of repairs, which is why it’s the best entry point for renters, first-time homeowners, and students moving into their own place. You can complete a lot of day-to-day maintenance without buying anything else.
This phased approach prevents impulse spending, because you only add tools after a problem reveals a gap. For instance, if you can’t reach a fastener comfortably, then an electric screwdriver becomes worth considering. If you keep needing to cut wire or remove small nails, then pliers enter the picture. That logic is similar to the planning model in resource planning guides, where missing tools become obvious only after you start using what you already have.
Phase 1 should also include a small container or pouch so your tools stay together. Organization is part of value because it reduces replacement costs and saves time during emergencies.
Phase 2: upgrade for recurring chores
Once you’ve used the starter kit for a few months, you’ll know which jobs repeat. That is the right time to buy items like a stud finder, pliers set, socket set, or electric screwdriver. Don’t guess. Let your actual maintenance pattern tell you what deserves a place in the kit. Repetition is the clearest signal that an upgrade will pay off.
This is where high-quality sale opportunities shine. If a good electric screwdriver goes on promotion, as in the Fanttik S1 Pro deal coverage, it may be the perfect next purchase. Likewise, if a seasonal promotion includes multiple respected tool brands, you can compare them side by side rather than treating the sale as a race to the cheapest listing. For shoppers who enjoy structured buying decisions, our metrics-first article provides a useful parallel: measure what matters before scaling up.
Phase 2 is also the point where storage matters more. As your kit grows, a cheap tote may become a nuisance, so choose a storage method that fits your space and keeps parts visible.
Phase 3: niche tools only when the need is real
Specialty items—pipe wrenches, voltage testers, stud-finder models with multiple modes, or drill accessory kits—should be bought last. These tools are useful, but they are not universally necessary, and many households can go years without needing them. If you are not sure you need a niche tool, that is usually a sign to borrow, rent, or wait. Buying too early is how budget kits become expensive collections.
A helpful rule is to delay specialty purchases until a task appears at least twice or becomes a regular maintenance issue. One-off projects are often better served by borrowing from a neighbor, using a local rental option, or buying the one specialized item only after the project scope is clear. This approach mirrors the measured decision-making in our used car buying guide, where the smartest choice depends on the real use case rather than the loudest pitch.
Real-World Starter Kit Examples
Example 1: apartment renter on a tight budget
An apartment renter may only need the six-tool minimum plus a small storage pouch and a pack of spare batteries. The most common tasks are hanging frames, assembling small furniture, opening packages, and tightening loose screws. In this case, skipping a large power-tool set can save a significant amount of money while still covering everyday needs. If the renter later moves into a larger space, the kit can grow naturally.
The mistake renters often make is buying a “complete” box that includes heavy-duty tools they will never use. A lean setup offers better value and less clutter, which matters when storage space is limited. It’s the same logic we use in our travel-tech packing guide: pack only what you’ll genuinely use.
Example 2: first-time homeowner
A first-time homeowner should plan for slightly more variety, because houses invite more maintenance than apartments. In addition to the basics, a socket set or ratcheting screwdriver may be worth the cost if there are multiple fixtures, appliances, or furniture pieces to maintain. This buyer should also watch for seasonal deals, because a few key purchases timed well can cover a lot of ground. A focused sale strategy is often cheaper than buying a massive bundle upfront.
If this buyer sees a deal like the spring tool promotions, the best move is to compare the kit against a gap list: what does the homeowner still need that the kit does not solve? If the answer is “nothing,” don’t buy it. If the answer is “a reliable electric screwdriver and a better wrench,” then the deal may be worthwhile.
Example 3: DIY hobbyist with repeated projects
A hobbyist who builds furniture, installs shelves, or does home fixes regularly can justify a more robust kit. They may benefit from an electric screwdriver, a quality drill, and a better bit set, but the core principle remains the same: buy based on frequent use. A hobbyist can spend more, but they should still avoid padding the cart with low-value extras. Even active DIYers need to distinguish between essential upgrades and “nice to have” items.
For this shopper, the key metric is not total number of tools but time saved per project and fewer redo mistakes. That is why a tool value guide is more useful than a random bundle recommendation. If a tool removes friction every weekend, it’s a good buy; if it only looks impressive in a drawer, it’s not.
Checklist: How to Avoid Overspending at Checkout
Ask these questions before you hit buy
Before purchase, run each item through a short checklist. Do I need this tool within the next month? Does it solve a real problem I’ve already had? Is the brand known for reliability, or am I paying for marketing? Does the price include everything I need to use it, or will I spend more later? If the answer to more than one question is “no,” skip the item.
Also check whether the item duplicates something you already own. Duplicate tools are one of the easiest ways to waste money on a home repair kit. If you already have a solid screwdriver, you do not need another one just because it comes in a larger bundle. That discipline is similar to our subscription audit guide, where cancellation is often the quickest way to improve value.
Watch the total cost, not just the listing price
Total cost includes tax, shipping, replacement bits, batteries, and storage solutions. A tool that is $5 cheaper online can become more expensive once the add-ons are counted. If a brick-and-mortar sale lets you inspect the tool in person, that can sometimes be the better bargain because you reduce the risk of returns. If you’re buying online, review warranty terms and return windows carefully.
For shoppers who enjoy price discipline, our cable pricing article and shipping analysis reinforce the same point: a low headline price is only one part of the value equation. On tools, especially, the cheapest option can end up costing more if it fails early or lacks necessary accessories.
Buy once, regret less
The best budget kits are built with a buy-once mindset, but not a buy-everything mindset. That means choosing dependable basics and upgrading only when usage proves the need. This approach limits clutter, preserves cash, and makes your kit easier to reach when a repair is urgent. The more intentional your purchases, the more money you keep for the projects that truly matter.
FAQ
What should be in a basic home repair kit?
A basic kit should include a multi-bit screwdriver, hammer, tape measure, adjustable wrench, utility knife, flashlight, and a small set of safety items like gloves and glasses. Those tools solve the majority of simple household fixes. If you add anything beyond that, make sure it addresses a real recurring need rather than a hypothetical project.
Is it better to buy a tool bundle or individual tools?
Individual tools are usually better for budget shoppers because they let you choose quality where it matters and skip unnecessary extras. Bundles can be valuable if every item will be used and the included quality is solid. In many cases, however, bundle pricing hides duplicates, weak accessories, or tools you won’t need.
Are electric screwdrivers worth it for a starter kit?
Yes, but only for some shoppers. If you do frequent furniture assembly, battery changes, or light home repairs, an electric screwdriver can save time and reduce hand fatigue. If you only use a screwdriver a few times a year, a good manual multi-bit screwdriver is usually the better value.
How do I know if a cheap tool is actually a good deal?
Look at durability, warranty, included accessories, and real-world usefulness—not just the price tag. A tool is a good deal if it performs reliably, fits your needs, and doesn’t require expensive extras right away. The lowest upfront cost is not always the best value if the tool breaks or underperforms quickly.
What’s the best way to save on tools during sales?
Make a list of what you actually need before the sale starts, then compare sale prices against your list. Use coupons or promo codes only when they work on the exact item you planned to buy. The best savings happen when a sale lowers the price of a tool you were already ready to purchase.
Should I buy store-brand tools?
Store-brand tools can be a smart budget choice for basic hand tools, especially if the return policy is good and the tool feels sturdy. For power tools or safety-critical items, pay closer attention to warranty coverage and performance reviews. Store-brand is fine when function is consistent and the savings are real.
Final Take: Build Lean, Buy Smart, Upgrade Slowly
A cheaper home repair kit works best when it is designed around actual household tasks instead of inflated bundle marketing. Start with the essentials, compare tools by usefulness rather than piece count, and wait for sales before upgrading to convenience tools. By following a phased approach, you can create a reliable starter tool kit without paying for extras that only look valuable on the box.
The most important habit is restraint. If you keep your kit focused, you’ll spend less, store less, and waste less time hunting for the right tool when something breaks. That is the real meaning of a good tool value guide: help you save on tools today while giving you the confidence to handle tomorrow’s repairs. For more smart-buying strategies across categories, explore our guides on seasonal price drops, personalized coupons, and value comparisons that show how disciplined shoppers consistently come out ahead.
Related Reading
- Local Dealer vs Online Marketplace: Where Should You Buy Your Next Used Car? - A practical framework for comparing price, convenience, and hidden fees before you commit.
- Proof Over Promise: A Practical Framework to Audit Wellness Tech Before You Buy - A smart way to evaluate whether a product truly earns its price.
- The $10 USB-C Cable That Isn’t Cheap to Sellers: Pricing, Returns and Warranty Considerations for Accessories - Learn how low sticker prices can hide real ownership costs.
- Beat the Algorithm: How to Trigger Better Personalized Coupons From AI-Driven Retailers - Use smarter coupon tactics to improve savings on future purchases.
- The Smart Shopper’s Guide to Festival Season Price Drops - Time your buys around predictable sales cycles to get more for less.
Related Topics
Jordan Ellis
Senior SEO Content Strategist
Senior editor and content strategist. Writing about technology, design, and the future of digital media. Follow along for deep dives into the industry's moving parts.
Up Next
More stories handpicked for you

Tech Conference Discounts Explained: How to Save on Event Passes Before They Sell Out
Electric Screwdriver Buying Guide: The Best Budget Picks for DIY Repairs

Nomad Goods vs. Other Premium Accessory Brands: Which Deals Offer Real Value?

Apple Savings Watch: Best Current Discounts on MacBook Air, Apple Watch, and Accessories

Best Cordless Cleaning Tools for Cars, Desks, and PCs
From Our Network
Trending stories across our publication group

Buy or Hold? How to Treat MTG Secrets of Strixhaven Precons at MSRP

How to Turn DraftKings’ $200 Bonus Bets into Real Value: A Low-Risk Playbook for Monday MLB/NBA Games

Under $100 Gaming Monitor Deals: Is the LG UltraGear 24" 144Hz Your Best Bet Right Now?
Best Gaming Monitors Under $150: Why the 24" LG UltraGear Is an Outstanding Value

Best Classic Game Sales Right Now: How to Build a Legendary Library Without Breaking the Bank
